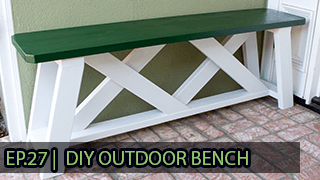
Let's build an outdoor garden bench! #woodworking #asmr #diy | Ep. #27
Stop Wasting Wood
Generate clear cut diagrams instantly with our new Cutlist Optimizer. Plan your cuts to make your next build easier.
My wife asked for a bench near her vegetable garden. "Something simple," she said. "Something modern," she added. "Something that won't rot in 6 months," she emphasized.
I decided to build a Slat-Style Bench with Waterfall Legs. This design looks like a continuous ribbon of wood that folds down the sides. It’s clean, drains water perfectly (essential for outdoor furniture), and is surprisingly comfortable.
Material Selection: The Outdoor Trio
When building for the outdoors, you have three main choices:
- Teak/Ipe: The gold standard. Lasts 100 years. Costs a fortune. (I am too cheap for this).
- Pressure Treated Pine: Cheap. Lasts forever. Looks green and ugly. Full of chemicals.
- Cedar / Redwood: naturally rot-resistant, smells good, turns a nice silver-grey, and is moderately priced.
I chose Construction Heart Redwood.
Material & Tools
- 4x4 Posts: For the internal structural legs.
- 2x4 Redwood: For the slats.
- Deck Screws: Polymer coated or stainless steel.
- Spar Urethane: For UV protection.
The Build Process
Step 1: The Frame
The "Slat" look is actually an illusion. Inside the bench, there is a sturdy frame made of 4x4s.
- I built two "U" shapes for the legs and a connecting stretcher beam. This provides the strength to hold 500+ lbs of people.
Step 2: Milling the Slats
The 2x4s from the store have rounded corners. I wanted a modern, sharp look.
- Ripping: I ripped (cut lengthwise) 1/8" off each side of the 2x4s. This removed the rounded corners and made them perfectly square 3" wide boards.
- Sanding: I sanded them to 120 grit before assembly. It's much harder to sand the gaps later!
Step 3: The Waterfall Cladding
This is the design feature.
- Top Slat: I laid a slat on top of the bench.
- Leg Slat: I laid a slat running down the leg.
- The Joint: I mitered them at 45 degrees where they meet at the corner.
- Result: The grain appears to "flow" over the edge and down the leg (like a waterfall).
Step 4: Spacing
Uniform spacing is key.
- I utilized 1/4" plywood scraps as spacers.
- I clamped each slat, pre-drilled, and screwed it to the internal frame.
- Hidden Screws: I screwed from the underneath or countersunk deeply so the top surface is clean wood.
Finishing: Fighting the Sun
The sun is the enemy of wood. UV rays break down the lignin (the glue that holds wood cells together), turning it grey.
- The Finish: I used Helmsman Spar Urethane. It is designed for boats. It has UV blockers and is flexible (so it expands/contracts with the wood in rain/heat).
- Application: 3 coats. Sanding lightly between coats. It gave the redwood a deep, glowing red color.
Conclusion
It sits among the tomato plants, looking sleek and architectural. The wide slats are great for holding a cooler or a garden basket. And because it's Redwood, I don't have to worry about termites or rot.
Cost: ~$120. Timeto Build: 6 Hours.