The Rise of DIY Wood Kilns: Taking Control of Lumber Drying
The Rise of DIY Wood Kilns: Taking Control of Lumber Drying - A step into the workshop.
Stop Wasting Wood
Generate clear cut diagrams instantly with our new Cutlist Optimizer. Plan your cuts to make your next build easier.
You Found It, You Dry It: How to Build a DIY Kiln and Stop Paying for Perfect Lumber
Yo, let me tell you a story. The other day, I'm walking through my neighborhood in Brooklyn, and I see it. Leaning against a brownstone stoop is this gorgeous slab of what looked like cherry. Some building super was probably clearing out a basement and just tossed it. It had this incredible grain pattern, a little bit of figuring. You know the type. The kind of wood you see in a fancy gallery in SoHo with a four-figure price tag on it. My heart starts racing. I'm thinking coffee table, maybe a set of floating shelves that'll make my place look like a million bucks.
I haul this beast back to my apartment—getting some weird looks on the subway, but hey, that's just another Tuesday. I get it into my shop (aka the second bedroom that my landlord thinks is for guests) and I pull out my moisture meter. My face falls. The thing is practically dripping. We're talking 30% moisture content. Using this for a project now would be a one-way ticket to a warped, cracked, self-destructing disaster in about six months.
The old me would have sighed, stacked it in a corner, and tried to forget about it for a year or two while it air-dried. But who has that kind of time? Or space? Stacking green lumber in a New York apartment is a great way to invite some… unwanted six-legged roommates. And buying kiln-dried lumber of this quality? Fuhgeddaboudit. We're talking a premium that would make my wallet weep.
But this is what I'm talking about when I say, "Work smarter, not harder." The game has changed. For the cost of a few sheets of foam board and a gadget you can order online, you can take control. I'm talking about building your own DIY wood kiln. It’s the ultimate hack for the urban woodworker, the thrifty craftsman, and anyone who wants to turn a lucky find into a masterpiece on their own schedule.
The Setup: Your Personal Lumber Factory in a Box
Forget picturing some giant, industrial smokestack. A DIY kiln can be as simple or as complex as you want, but for a small shop, simple is beautiful. We're basically building a hotbox. An insulated container that traps a little bit of heat and circulates air to slowly and steadily pull the moisture out of your wood.
Think of it like this: you're creating a controlled environment. Air-drying is great, but it's slow and depends on the weather. In a humid Brooklyn summer, you're not drying anything. In the winter, the air is dry, but it's not a consistent process. The result? Wood that can be unstable. You build a beautiful tabletop, bring it inside your heated apartment, and it starts moving and twisting like it's possessed.
A kiln speeds that process up and gives you a much more stable final product. By controlling the heat and humidity, you're essentially stress-relieving the wood. You're getting it acclimated to the kind of dry, indoor environment where it's going to live for the rest of its life. That means fewer cracks, less warping, and no angry emails from clients six months down the line.
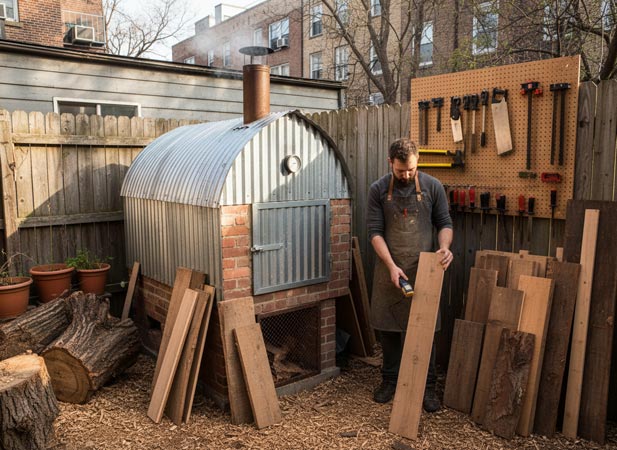
So, how do you build this magical box? The cheapest and easiest way is the classic insulated box method. Get yourself some rigid foam insulation panels from the hardware store—the pink or blue stuff. You can build a box big enough for a few boards or a small slab. We're not trying to dry a whole tree here. Seal the seams with good-quality tape. You want this thing to be as airtight as possible. Make a door on one end, and you've got the basic structure. I've seen guys convert old refrigerators or freezers, which are already perfectly insulated. Now that's some next-level upcycling.
The Execution: The Brains of the Operation
Here’s where the magic happens. A box with a heater is just an oven; you'll cook your wood and ruin it. The secret to a successful DIY kiln is managing the holy trinity: Heat, Air, and Humidity.
-
The Heat Source: Don't get fancy. A small, cheap electric space heater can work. Some people use incandescent light bulbs for a very gentle, low heat. My favorite method, and the one that feels the most pro, is a dehumidifier. A small household dehumidifier will not only generate a bit of heat but will also actively pull moisture out of the air. This is the engine of your drying process.
-
Air Circulation: This is non-negotiable. You need a fan. Not a big one, just a small, cheap circulation fan. You need to keep the air moving inside the box so that the moisture being released from the wood is wicked away evenly. Without a fan, you’ll have wet spots and dry spots, which is a recipe for stress and cracking. You want that air flowing over every surface of every board.
-
The Controller: This is the brain. This is the "smarter, not harder" part. You can get a digital temperature and humidity controller online for less than you'd spend on a fancy dinner. These little gadgets are amazing. They have a probe you put inside the kiln, and you can set your target temperature and humidity. The controller then turns your heat source (or dehumidifier) on and off automatically to maintain that environment.
This is what separates your DIY kiln from a dumb hotbox. You can program a drying schedule. You start slow and gentle, with higher humidity, to let the moisture on the surface of the wood escape without causing stress. Then, over a few days or weeks (depending on the thickness and species of wood), you slowly raise the temperature and lower the humidity. The controller does all the work. You just set it and forget it. Check on it once a day, measure your moisture content, and watch the numbers drop. It is deeply, deeply satisfying.
The Payoff: Beyond Just Saving Money
Sure, the most obvious win here is the cost. That cherry slab I found? To buy it kiln-dried from a lumberyard would have cost me hundreds. My total investment in a small DIY kiln was a fraction of that. Now, any time I find a unique piece of reclaimed wood or a friend offers me a slice from a tree they took down, I have a way to make it usable. I'm not limited by what the commercial suppliers decide to stock.
But it’s more than that. It's about control. It’s about quality. When you dry your own lumber, you know its story. You know it was done right. You've taken this raw, unstable material and transformed it into something workable, something precious. You're controlling the process from log to final product. For a craftsperson, that is the ultimate form of expression.
It fundamentally changes your relationship with the material. You’re not just a consumer of wood; you're a collaborator with it. You’re taking an active role in preparing it for its new life as a piece of furniture, a piece of art.
So next time you walk past a chunk of discarded wood with a beautiful grain, don't just see it as firewood. See it as potential. With a little ingenuity and a smart setup, you can have a steady supply of top-quality lumber for pennies on the dollar. You just have to be willing to build the box. Now, if you'll excuse me, I've got a coffee table to build.